
Teach
The Avatar Database
Everything up to this chapter has been about how the avatar looks. This one is about what it knows. An avatar is the face of a chatbot, and the reason that chatbot exists is to answer the questions real visitors arrive with — your hours, what you sell, where you are, what this week's offer is. None of that lives in a face or a state machine. It lives in the Avatar Database: a per-avatar knowledge store you fill and curate here, and that the deployed avatar retrieves from — live, one search per conversation turn — to ground its answers.
Getting in
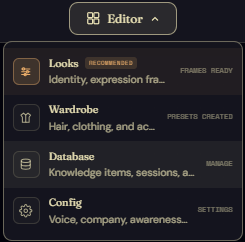
From the studio, open the Editor dropdown in the top bar and pick Database.
First open: proposals from the crawl
The database is rarely empty on first open. If you let the setup wizard crawl your website, every page it found is waiting here as a proposed knowledge item — one proposal per page, each titled and tagged with its page type (home, about, blog…).
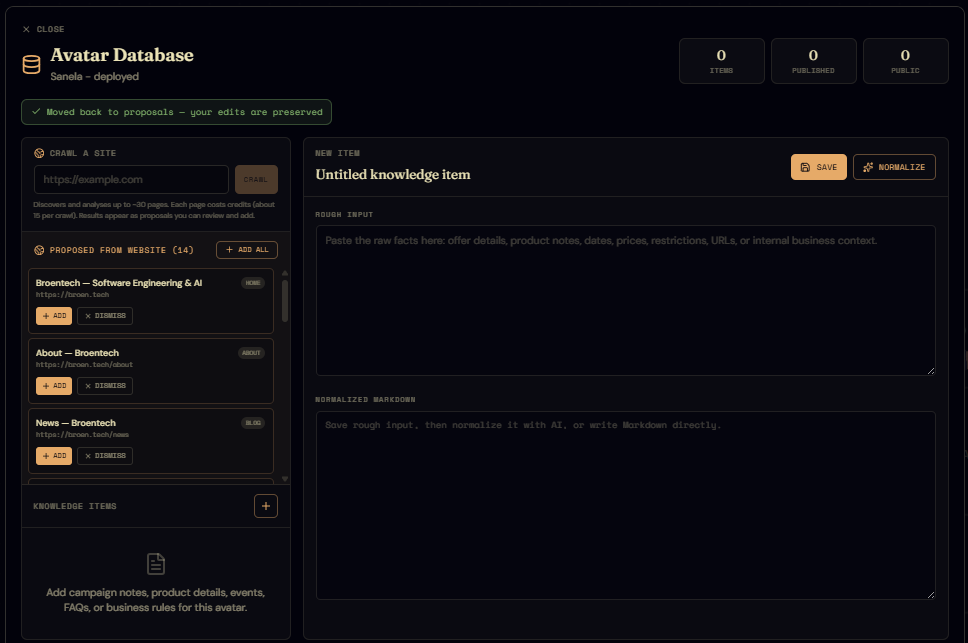
Proposals aren't knowledge yet — they're candidates you choose from. The left column holds two things:
- Crawl a site, at the top. Paste any URL and click Crawl to discover and analyse up to ~30 pages of a site (crawling costs credits); the pages it finds drop in below as fresh proposals. Use it to pull in more of your own site later, or a partner's, without leaving the dialog.
- Proposed from website (N) — the candidate list. Each card has Add (accept it) and Dismiss (hide it from the list); Add all at the top accepts everything still pending in one go.
Accepting proposals
Let's take the first three. Each Add turns a proposal into a real knowledge item — it leaves the proposals list and appears below under Knowledge items, as a draft. That word matters: accepting never publishes anything, so a crawl can't push raw page text in front of a visitor behind your back.
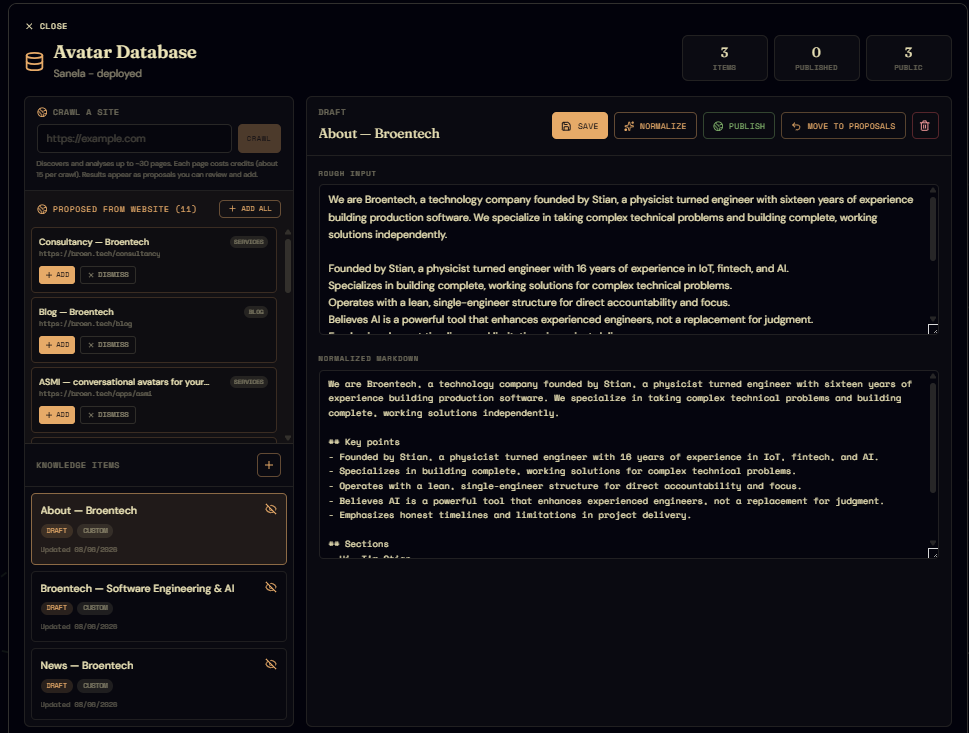
The counters across the top (Items, Published, Public) keep a running tally as you work. Click any item in the list to open it in the editor on the right.
The item editor
Selecting an item fills the right-hand panel with its contents.
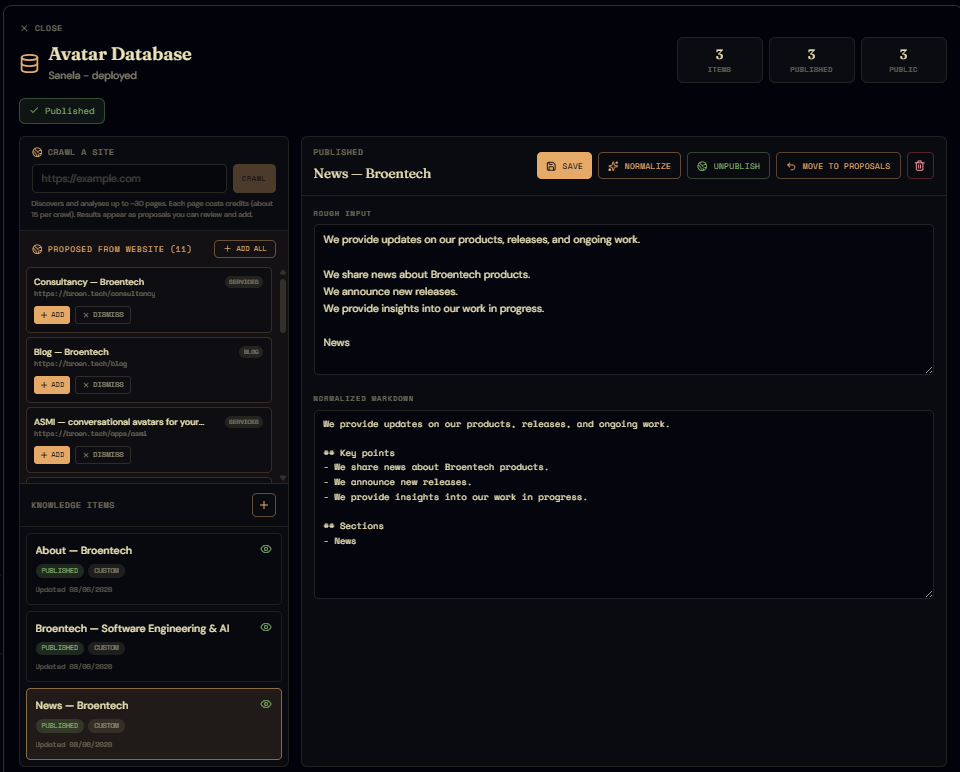
The item's title sits at the top as an editable heading — click it and type; there's no separate title field shadowing it. A small status line just above (draft, published, or new item) tells you where the item stands.
The action row to the right of the title:
- Save — persists the item as it currently reads.
- Normalize — runs the Rough input through the editor's AI (on credits) and writes a clean, structured Markdown version into the Normalized markdown field, the form the avatar actually retrieves and hands to its model. It also derives a short summary and keywords in the background to sharpen retrieval.
- Publish / Unpublish — a knowledge item is invisible to the deployed avatar until it's published; publishing makes it answerable, unpublishing pulls it back to draft. Each row in the list mirrors this with an eye in its corner: a green open eye when published, a yellow crossed-out eye when still a draft.
- Move to proposals — archives the item and returns its source page to the proposals list with every edit preserved, so you can un-accept something and re-add it later without losing work. It appears only for crawled items whose page is still in the proposal pool; the reversible move for a hand-written item is simply to unpublish it.
- Delete (the trash icon) — removes the item permanently.
Below the action row are the two content fields:
- Rough input — the raw facts, however messy: offer details, prices, dates, restrictions, URLs, internal context. This is the field you author in.
- Normalized markdown — the cleaned-up output of Normalize, or Markdown you write yourself.
You can edit both, but the recommended loop is to keep your edits in Rough input and lean on Normalize to regenerate the Markdown. Treat Normalized markdown as a generated artifact you occasionally touch up — not the field you write in — and the retrieved text stays consistent and model-friendly.
Draft → published → answerable
The lifecycle is deliberately short: an item starts as a draft, you shape it, you publish it. Only published items are eligible for the deployed avatar's retrieval, so drafting is safe — you can stage a dozen half-finished entries and none of them reach a visitor until you publish.
Publishing is the live switch. The deployed integration fetches knowledge per turn from the avatar's search endpoint rather than baking it into the build, so a freshly-published item is answerable on the visitor's next question — no redeploy required. Retrieval is page-aware, too: an item whose source URL matches the page the visitor is on gets a ranking boost (not a filter), which is exactly why the crawl-sourced items, each keyed to its own page, pay off — an on-page question surfaces that page's facts first.
With a few items published, the chatbot finally has something to say. A visitor asking the deployed avatar about anything you've published — your hours, your services, that week's campaign — now gets a grounded answer instead of a polite shrug.
What comes next
Knowledge is the last of the build surfaces — face, voice, behaviour, and now what it knows are all in place. Before you hand the avatar to a coding agent, you'll want proof it actually behaves: that it routes the right question to the right state and answers from the knowledge you just gave it. That's the testing pair — the Narrative Player to record and replay a canonical happy-path, and the Simulator to chat against the live state machine with a full millisecond-level trace.